Can you touch your toes? Can you touch your toes without experiencing back pain, neck pain or pain in the knees? Can you touch your knuckles to your toes? Can you touch your wrist to your toes and place palms flat on the floor? Can you touch your elbows to your toes? Can you go even lower bringing your forehead to your shins?
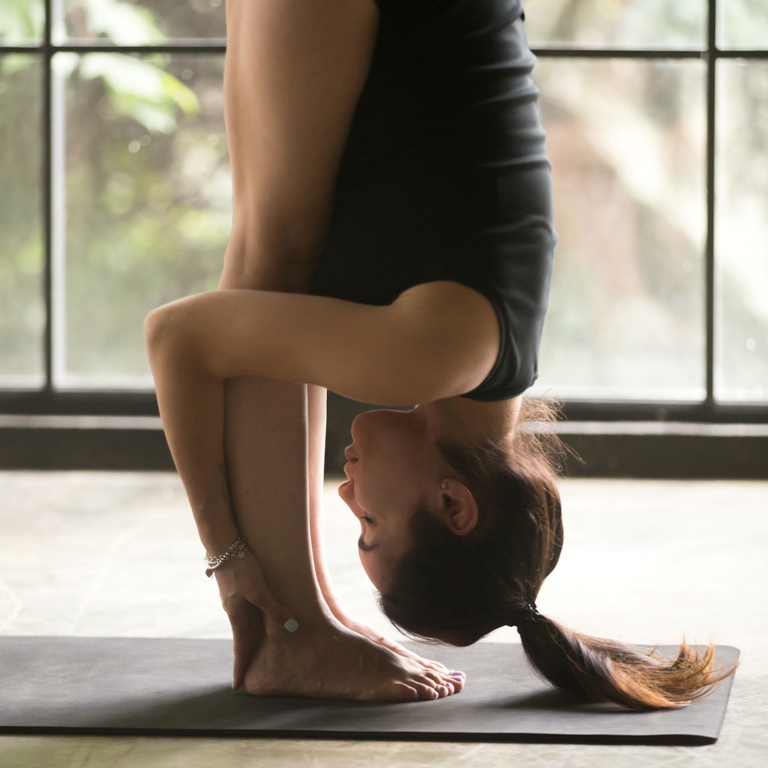
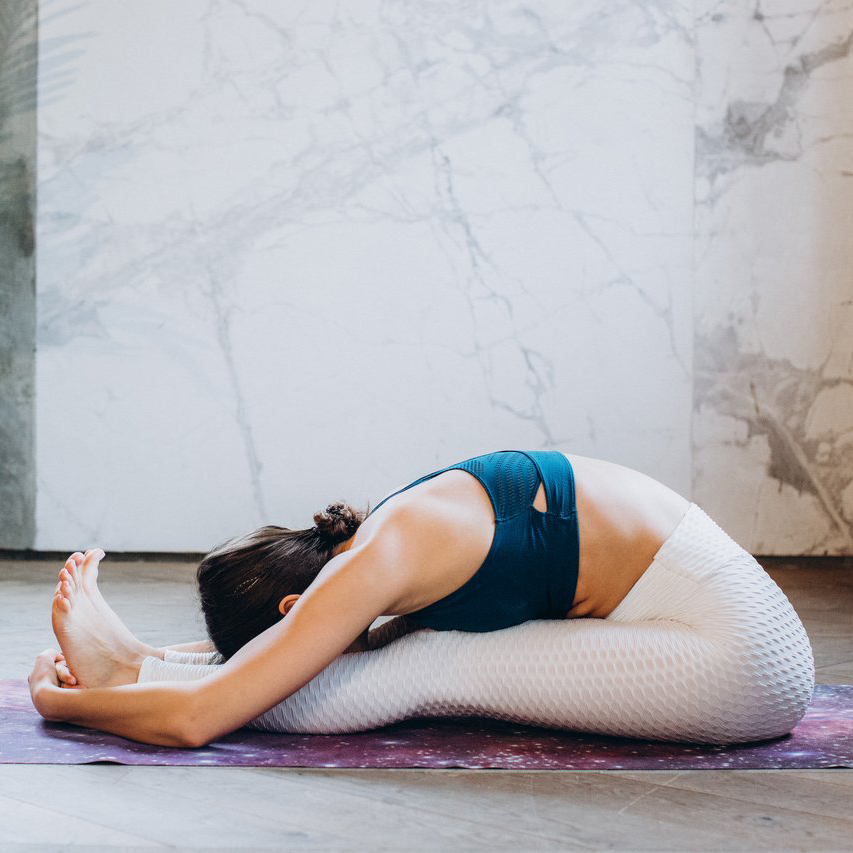
You see, touching your toes is no ordinary business and it doesn’t stop there. One of the simplest and best daily stretches I like to practice is Hastapad asana (hand to feet pose), or Uttan asana (standing forward bend) and it’s seated variation – Paschimottan asana (seated forward bend).
I start by maintaining the right body position with correct breathing and I am mindful of good pain and bad pain so as to avoid injury while performing this simple exercise.
Body Position
- Feet
Feet are placed parallel to each other, together or apart. Place toes together but heels two inches apart, or, keep your feet one foot apart with toes pointing slightly inwards so that the outer outline of each foot is parallel to each other and also in line with your hips. Positioning your feet is important to avoid knee and hip pain.
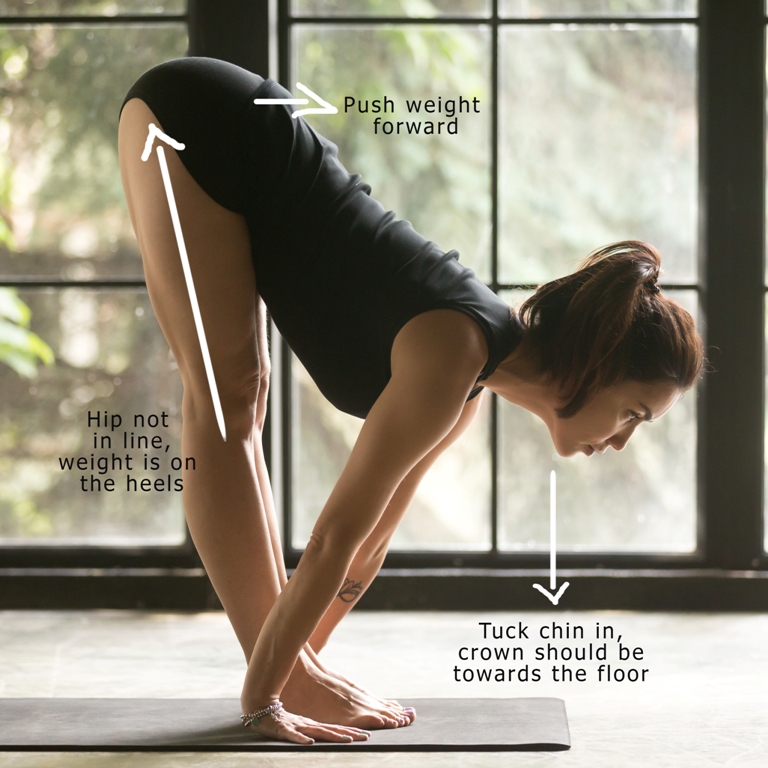
Alignment of your entire body depends on how you place your feet.
- Neck
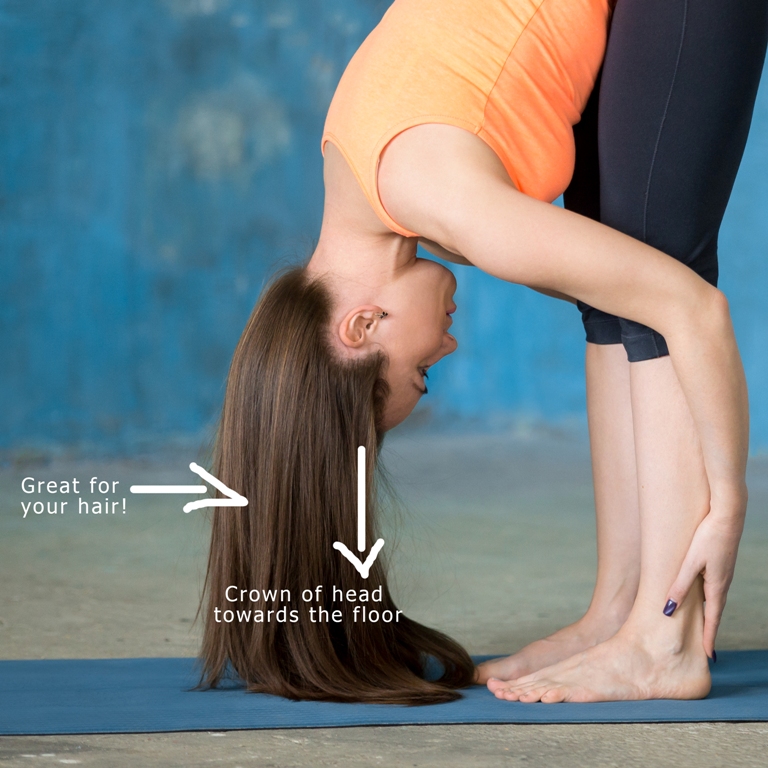
Neck at all times is in a straight line with the spine. Keep your chin tucked in slightly to ensure the same. When in final position, we have a tendency to lift our head – this arcs the neck and can cause neck pain. Make sure the crown of your head is pointing towards the floor; this will keep your neck in line with your spine.
- Abdomen
Stomach is compressed and held in during the final position.
- Chest
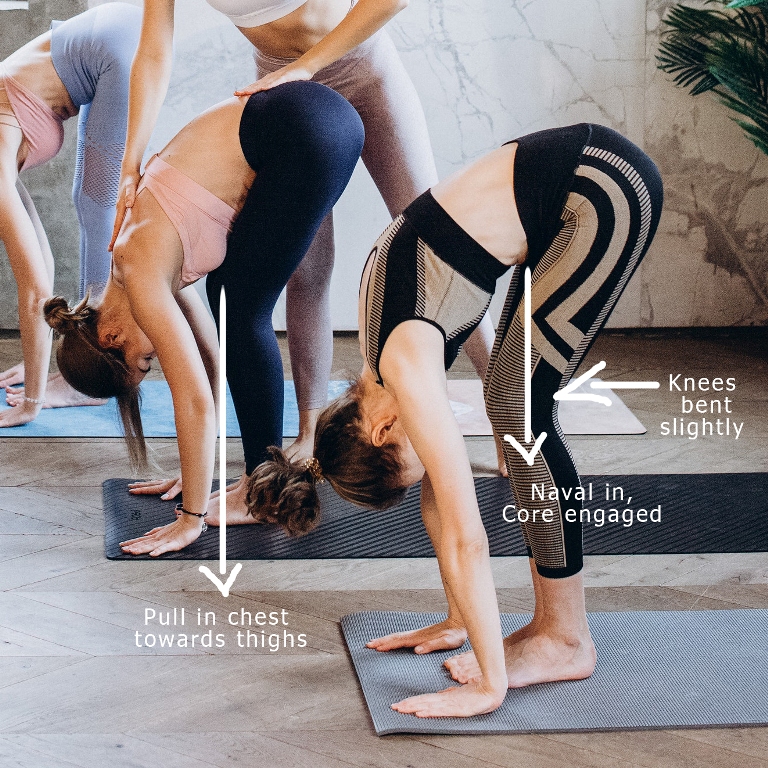
Chest is pulled in towards the thighs to prevent curving of the back.
- Spine
Back is held straight in standing position and up to half way down. Stretching the spine works the spinal extensors (mid and lower back muscles). In the final position the back drops down straight and is relaxed. Pain in the lower back is bad pain. To avoid this pain make sure your core is strong and held in firmly. If pain persists, come out of the posture and avoid all forward bending exercises.
- Knees
Do not lock your knees. Especially if you have over extended knees, bend them slightly.
Breathing
- Deep Inhalation – We breathe in as we stretch our hands upwards, bringing our stomachs out with back slightly arced. As we lift our hands up, our rib cage expands enabling a deep inhalation.
- Prolonged Exhalation – Breathing out we bend forward dropping our hands towards the floor. When we exhale slowly, our stomach is pulled in.
- Inhale gently – Breathing in, we come up again, stretching our hands upward.
- Exhale gently – Breathing out our hands comes back down to the side and we relax.
- Normal breathing.
Note: If you are holding the pose make sure to keep breathing after you have exhaled completely.
Muscles at work
We think the aim of this posture is to be able to touch our toes, but that is not so dearies. While this posture does lengthen your spine and eventually result in greater flexibility, the muscles at work are actually those at the back of your legs. The good pain with the correct stretch is felt in your hamstrings and calf muscles along with your glutes.
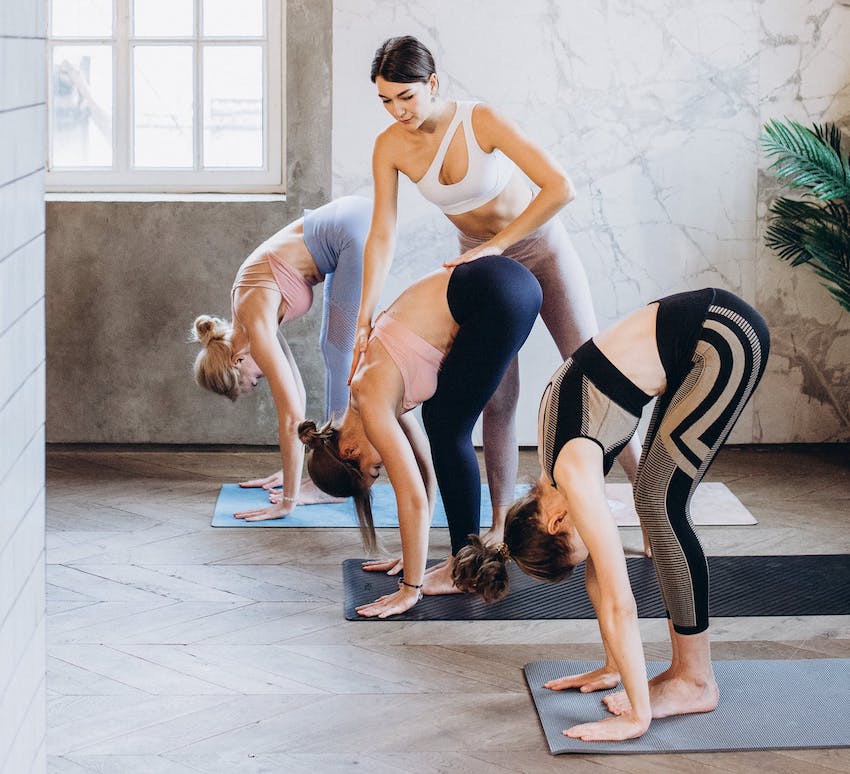
The final pose should have a straight and relaxed back with chest as close to your thighs as possible. If you are unable to reach for your toes, hold your ankles or your shins. Bend your knees slightly and pull your upper torso closer towards your legs. Then try to straighten your knees and you will feel the stretch at the back of your legs. That is good pain and you’re doing the exercise correctly and effectively. Make sure your weight is forward and you are not leaning back in the final pose – keep your hips in line with your heels.
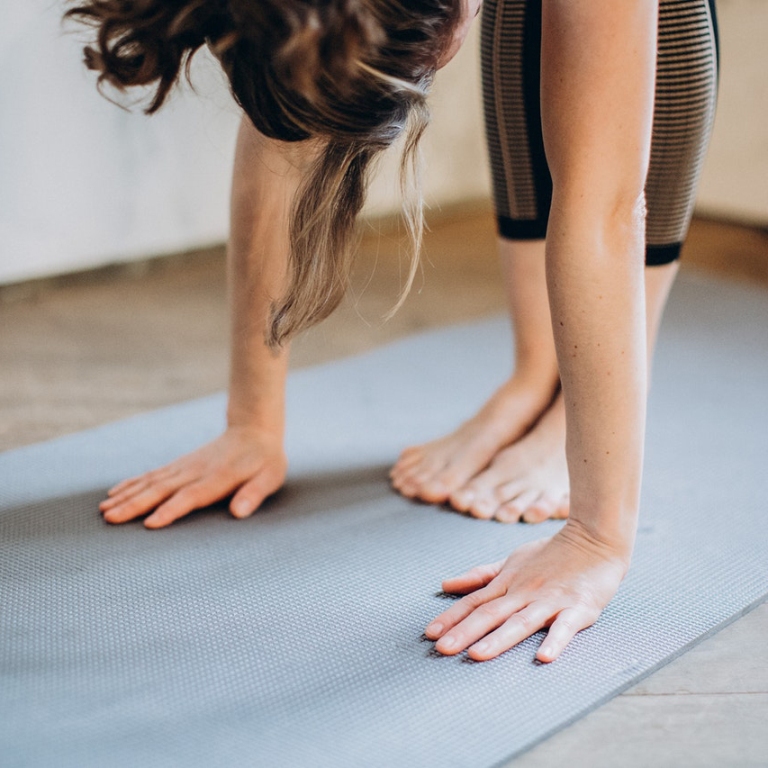
Correct posture is highlighted in the images below:
Benefits
- Stretches hamstrings and calves
- Keeps spine strong and flexible
- Works core muscles, good for flattening abdomen
- Relieves constipation and sinusitis
- Induces clavicular breathing – (ventilation of uppermost part of the lungs)
- Improves blood circulation
- Soothes the nervous system
- Improves hair
- Improves body posture
- Instils humility, acceptance and gratitude
Avoid this Asana if you experience:
- Heart ailments, high BP, Hypertension
- Spinal injury or abnormalities
- Eye disorders
- Pregnancy, stomach ulcers, hernia
To conclude, the forward bend is best practiced in the mornings or on an empty stomach. Performing just one asana correctly and daily can transform you in so many ways! That is the magic of yoga. A true yogi once said, “Yoga is not about touching your toes, it is what you learn on your way down.” So folks, keep practicing, keep learning and keep transforming.
If you are a beginner, definitely practice with an instructor. Connect with me to plan a personalized yoga sequence. Our online yoga sessions are available to suit your timings. Get in touch! Call/Sms/Whatsapp +91 9820673466 for more info